This Rubik's cube-inspired kinetic sculpture uses an ESP32, motors, and LEDS, and is controlled by an online server through wifi.
ARTISTIC VISION
Scramblizer's three arms rotate outwards, change LED colors, and then rotate back inwards. This evolution mimics the scrambling of a Rubik's cube, where faces are rotated in order to change the colors on each face.
I decided on this artistic interpretation of scrambling a Rubik's cube while I was trying to think of how to incorporate the motors; the motors provide rotational motion, and Rubik's cubes also use rotational motion. I also thought it would be interesting to separate out the physical (rotation) and visual (color changing) aspects of scrambling a Rubik's cube. On a real cube, these two things happen simultaneously, as the colors of each face change while the faces get rotated. However, when it comes to speedcubing, these aspects relate to very different skills. Fast rotational motion requires fine motor control and is a purely physical task, while tracking color changes requires fast pattern recognition and is a purely mental task. Scramblizer emphasizes the difference between these skills by keeping physical and visual changes separate.
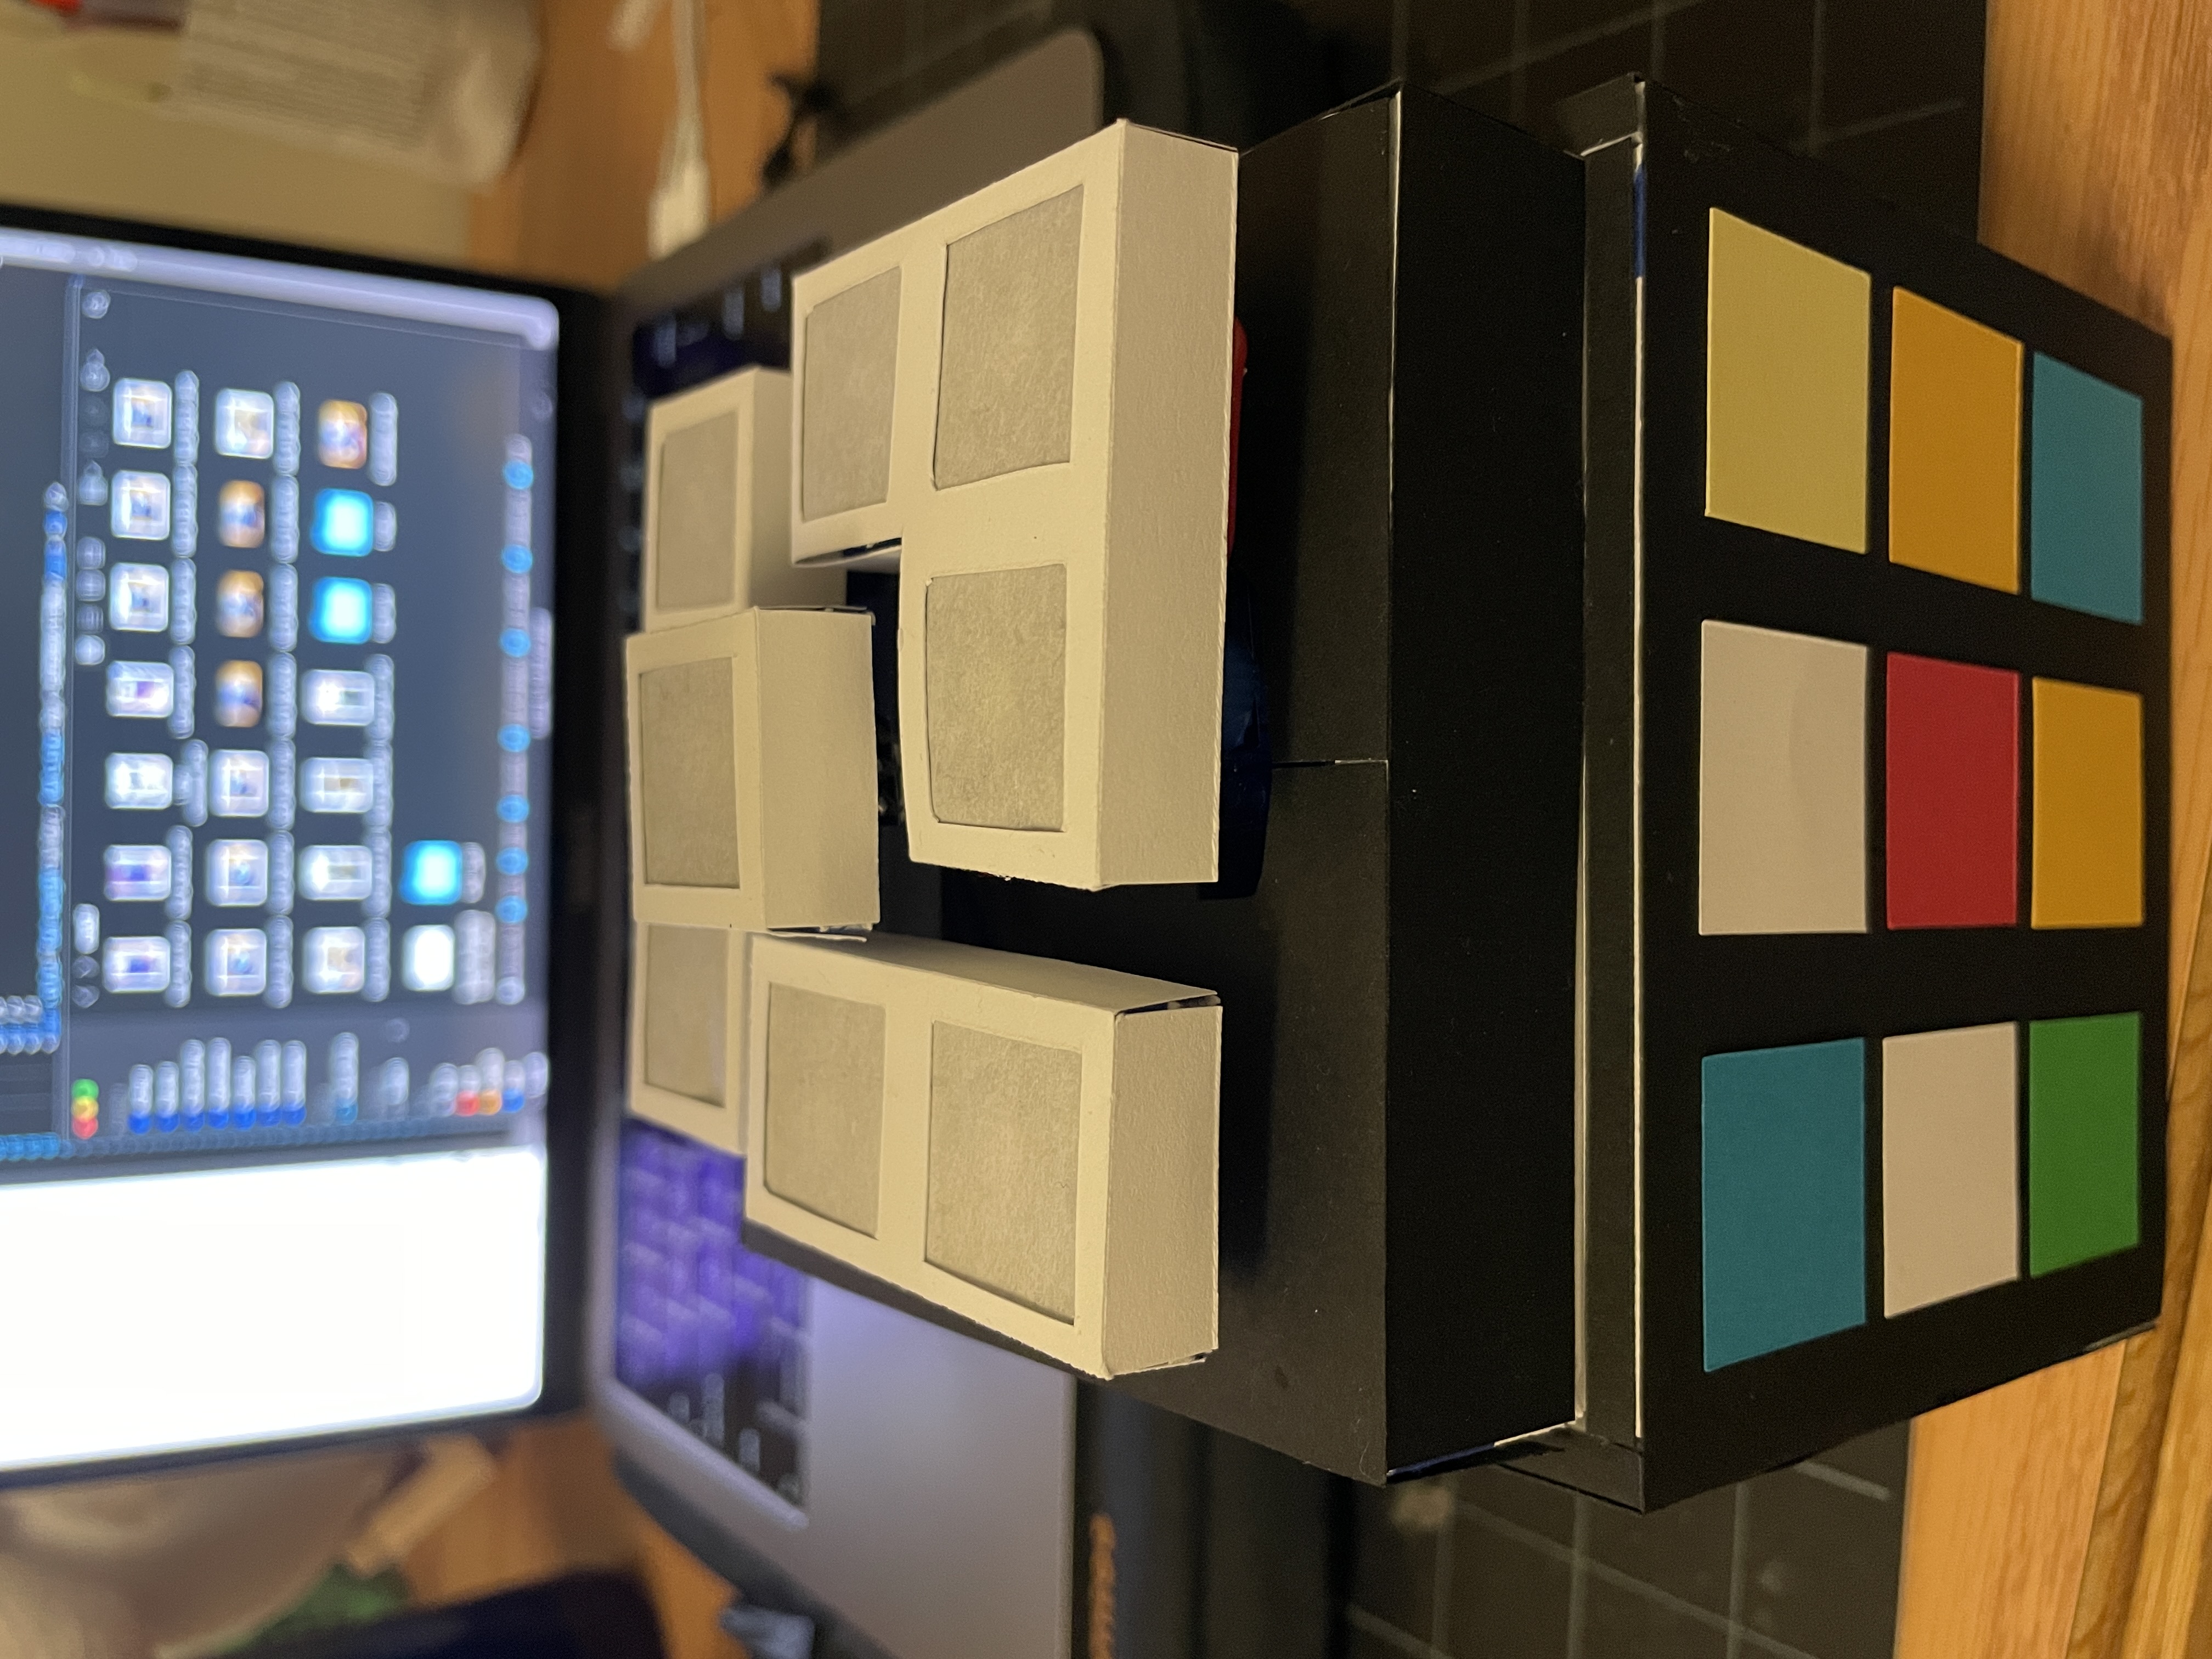
The center cubies on Scramblizer accurately reflect the placement of center colors on a typical Rubik's cube.
REPRODUCTION
Technical reproduction information is available at the github repo.
FABRICATION
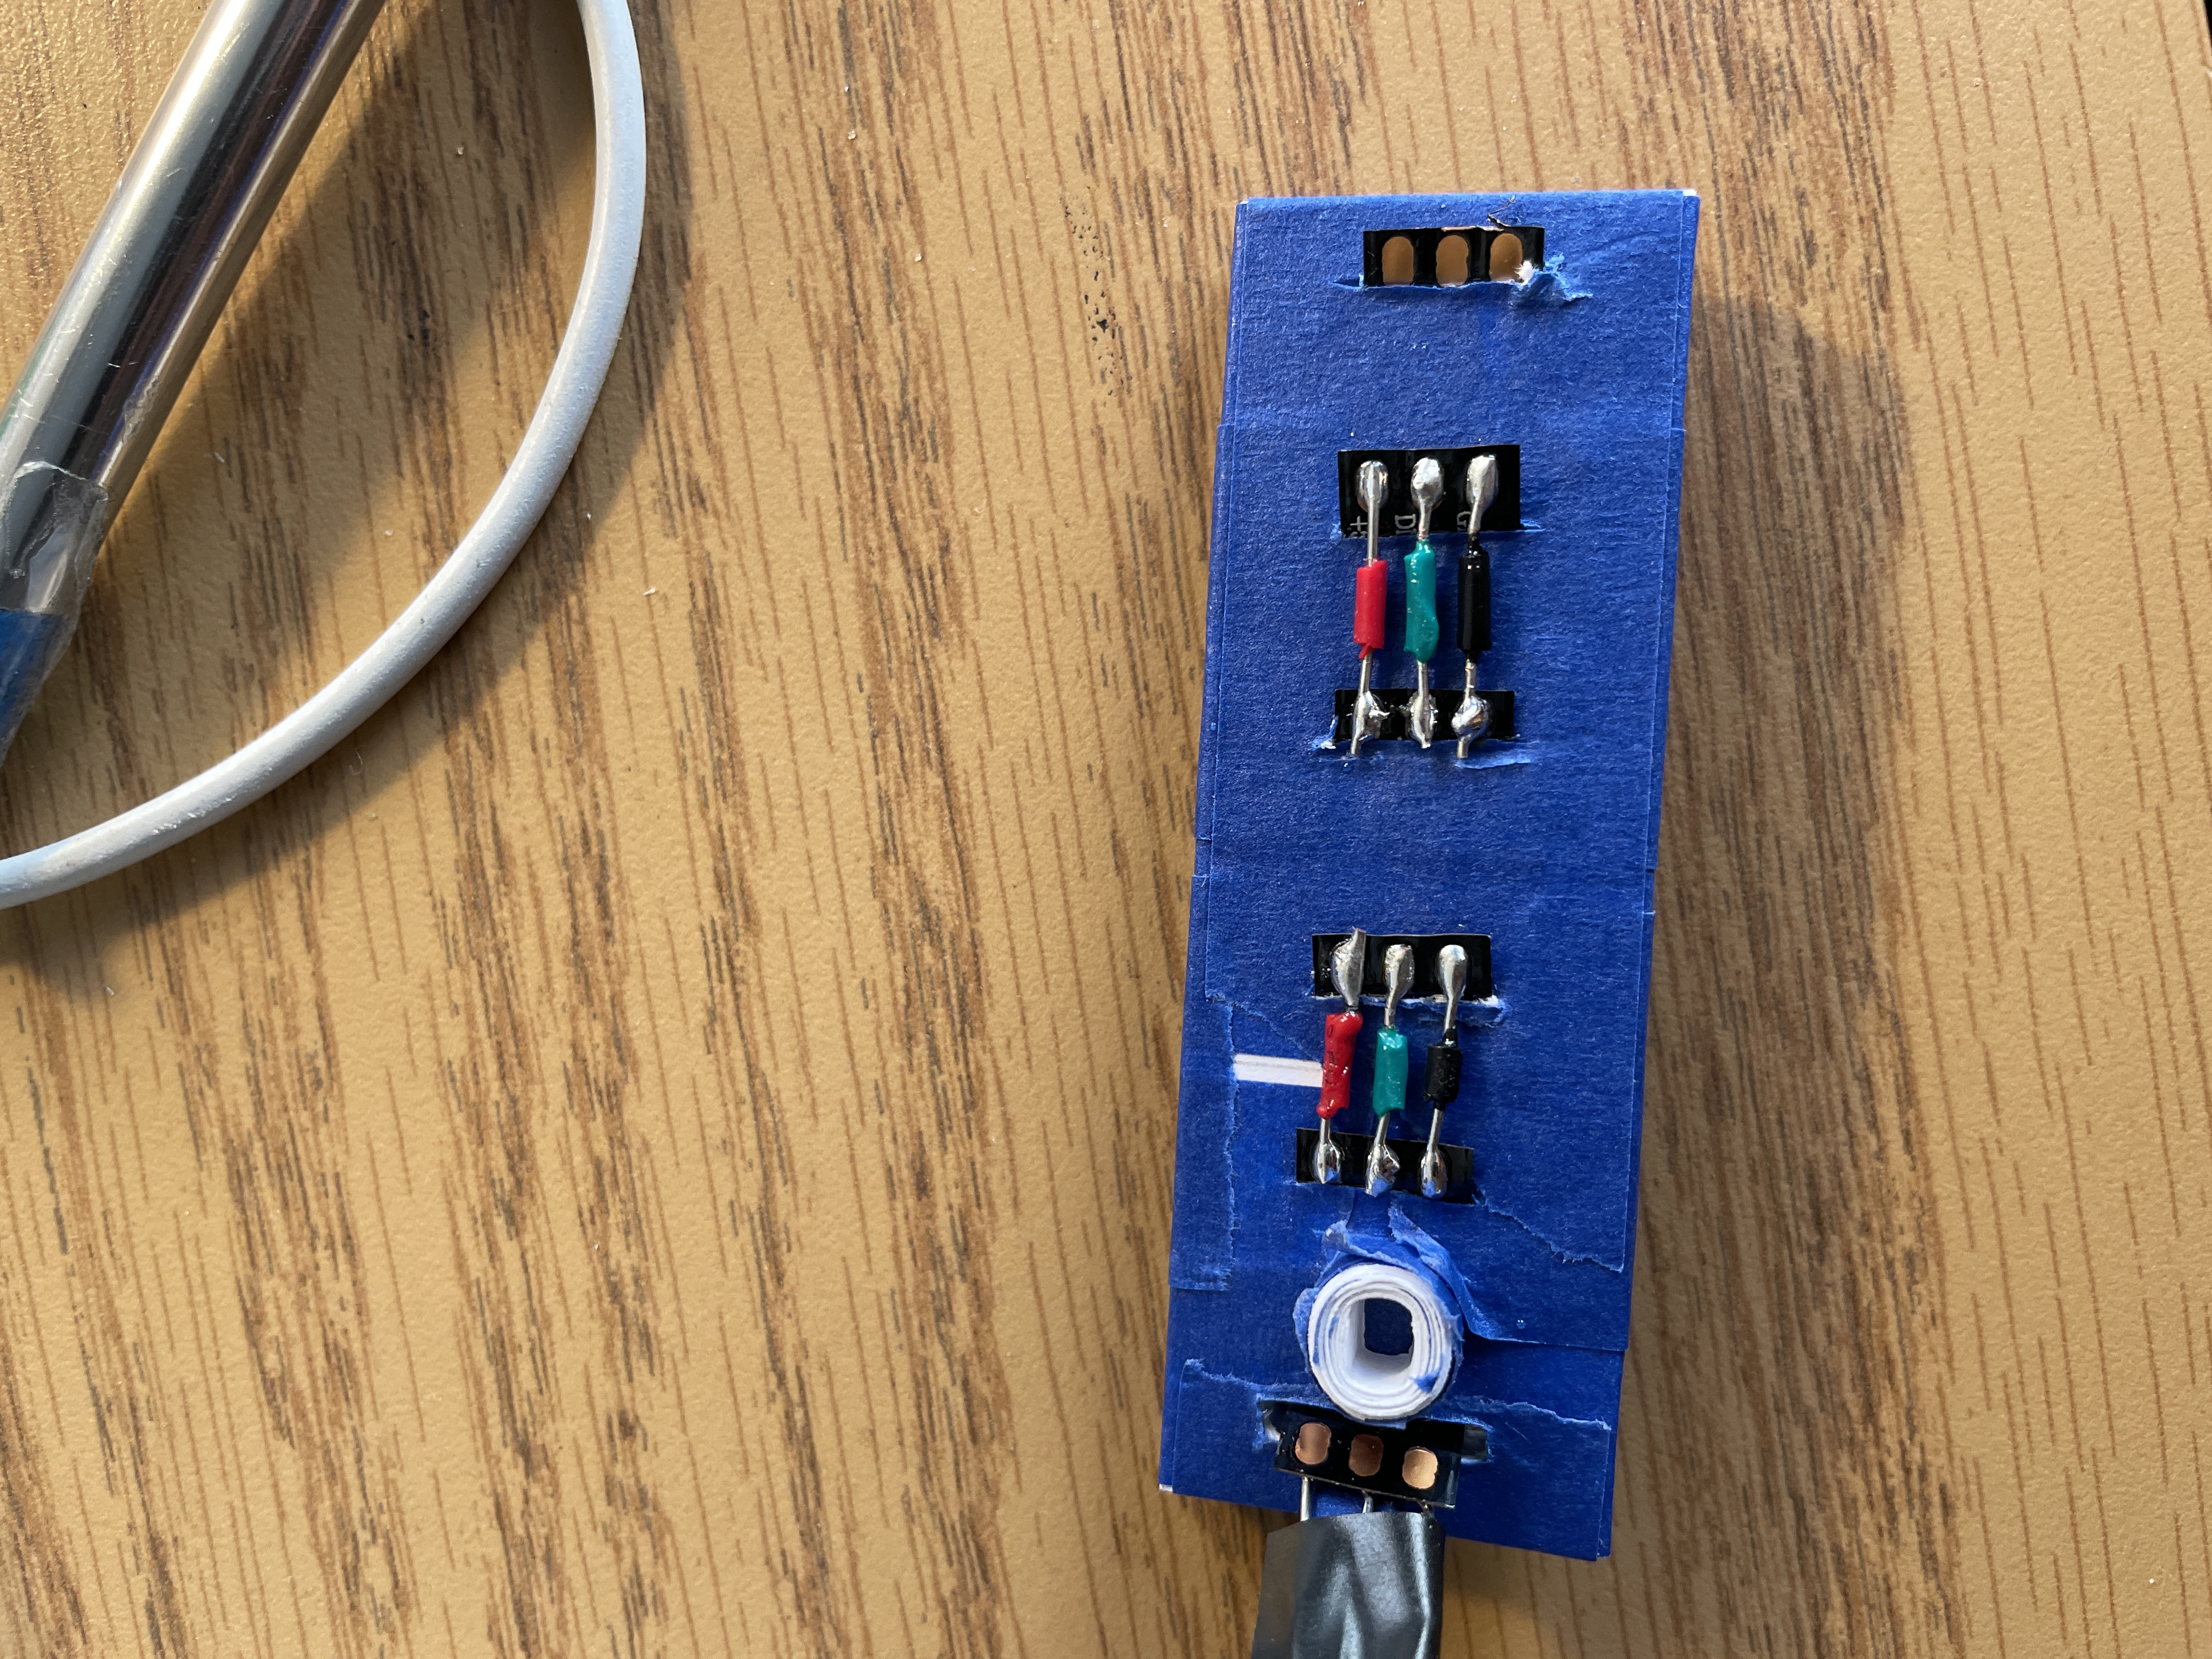
The trickiest part of this project was wiring up the LEDs properly. The LED strips are connected to the ESP32 in four chunks: one for the center, and one for each of the three rotating arms. This separation made it a lot easier for the wires to allow rotational movement.
The Neopixel strips I had on hand were too long to fit onto my "cubies", so I had to cut them up and re-connect them with wires along the undersides of the cubies.

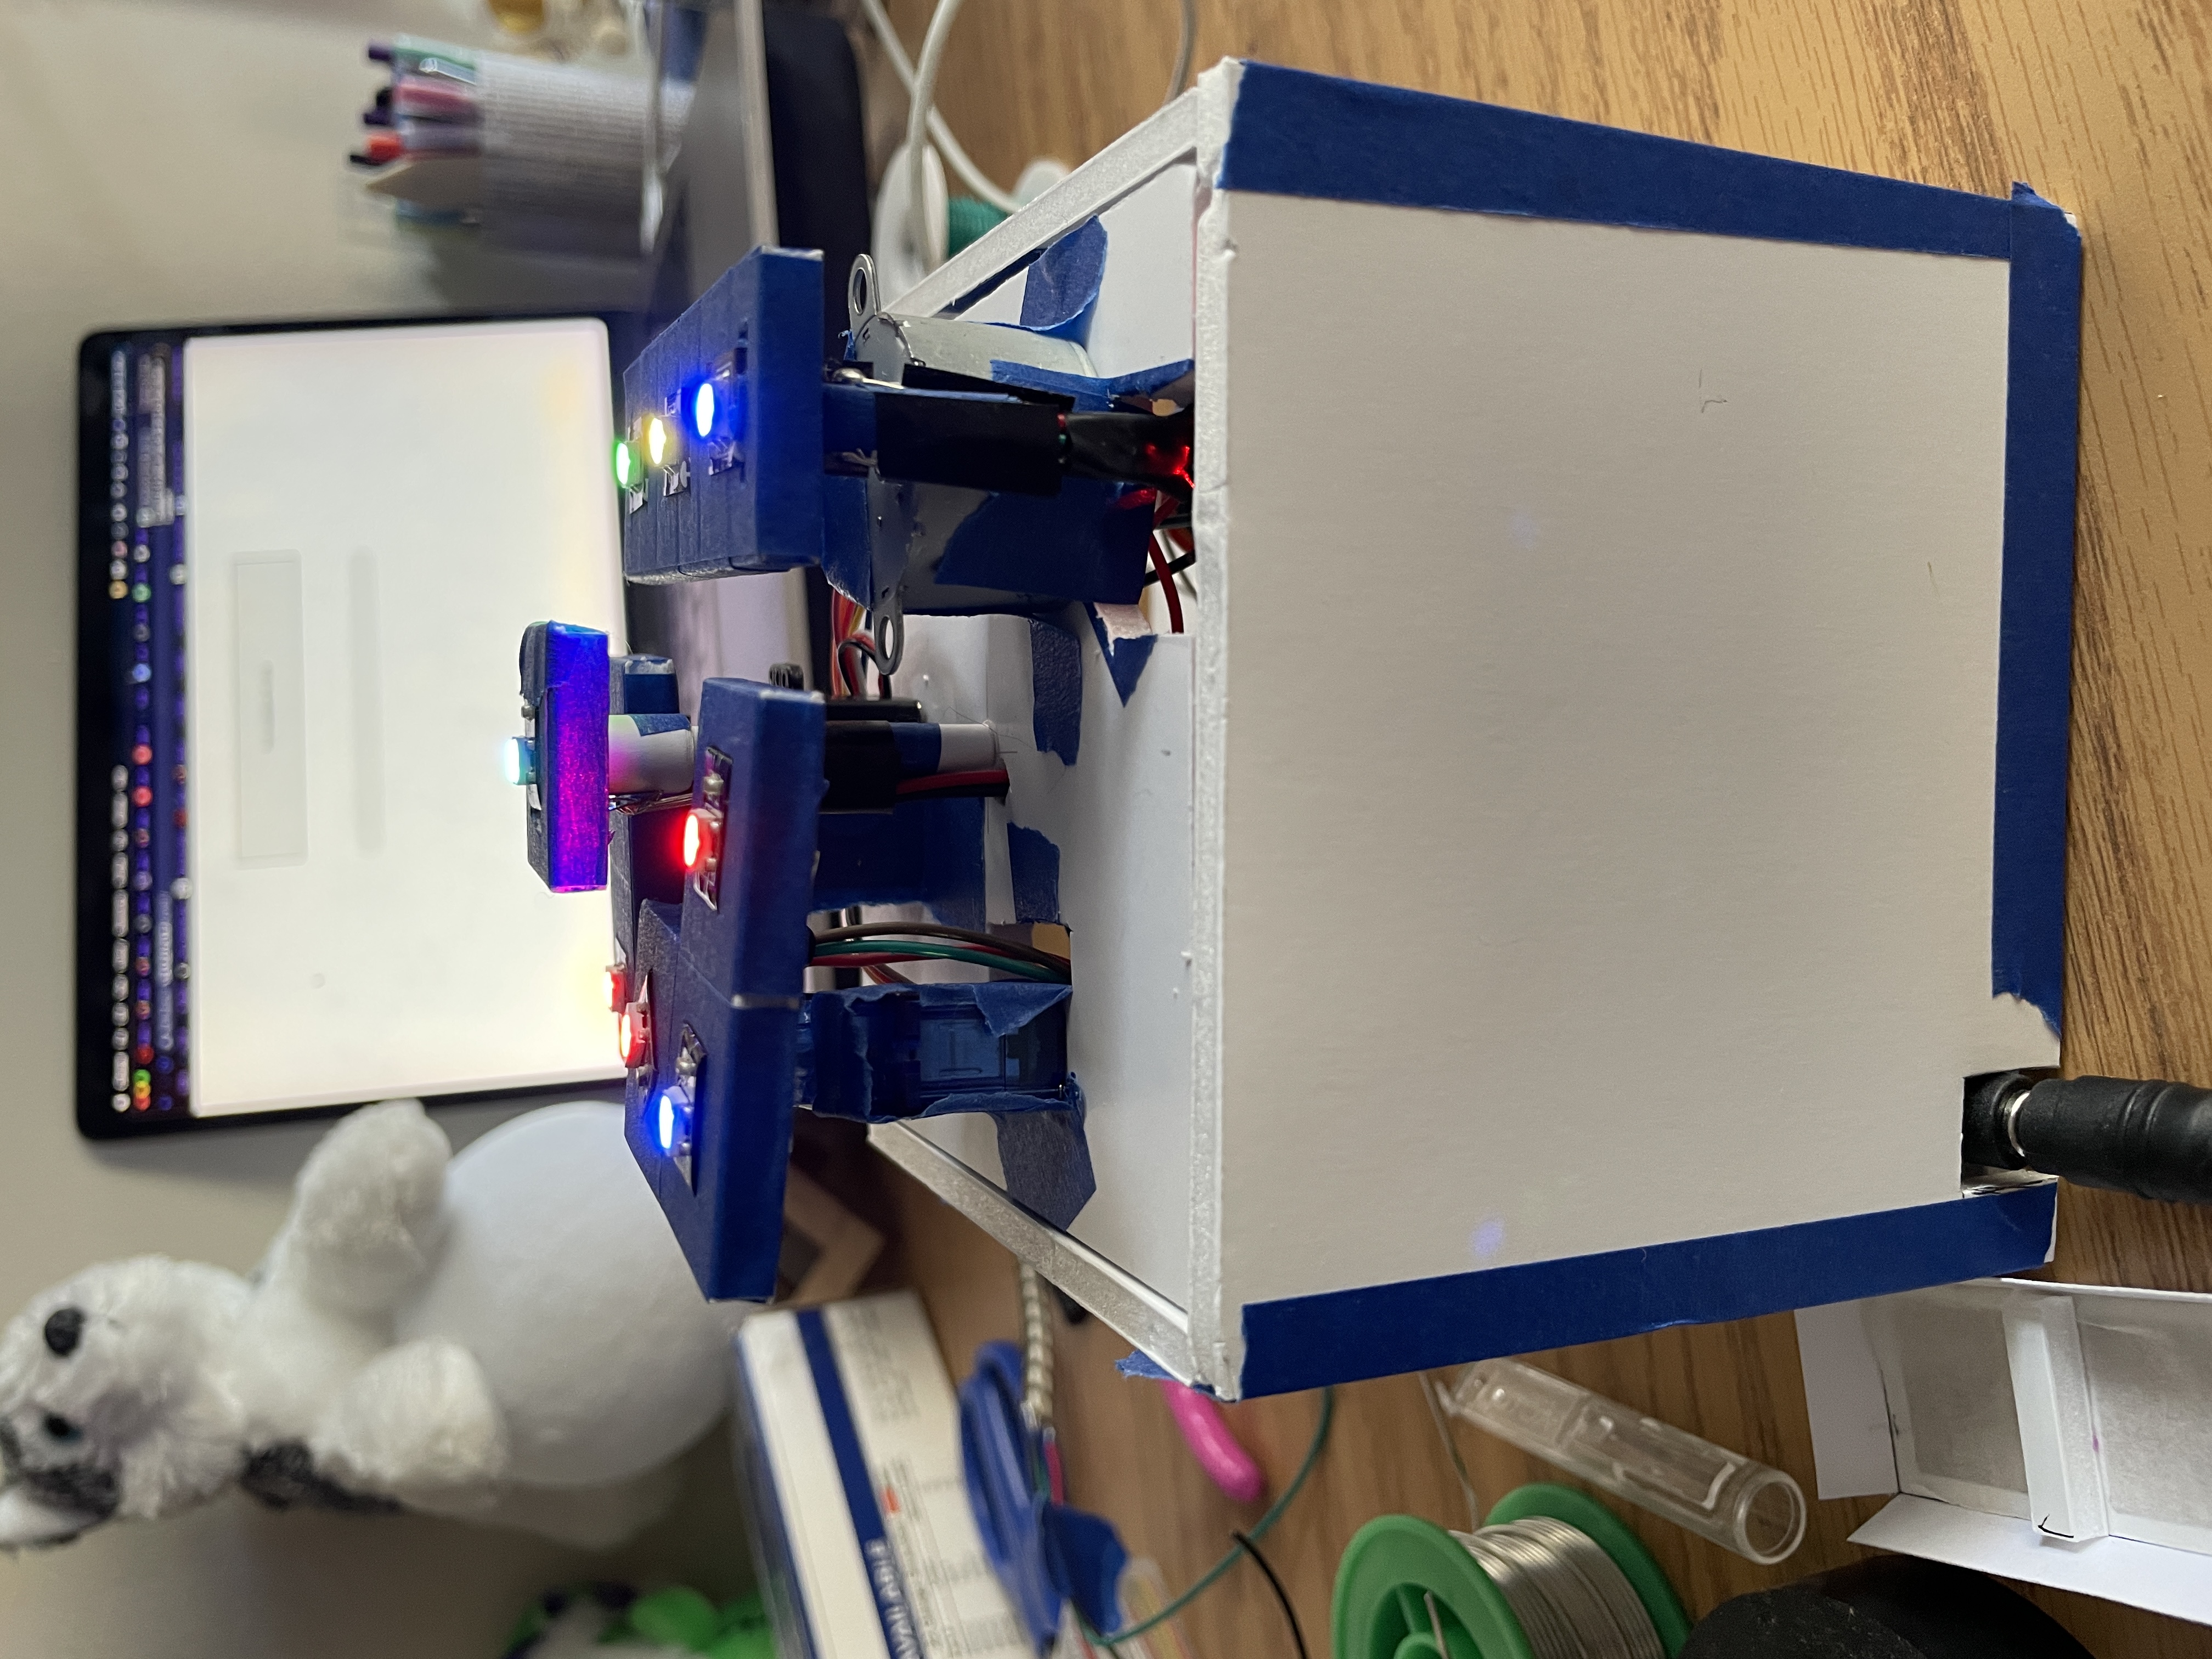
I then covered the LEDs with double-layered trace paper framed in cardstock to diffuse the LEDs into square-shaped light.
CODE WALKTHROUGH
The code in this project is quite simple. In
setup(), the center cubie is set to yellow, to match the cardstock centers in accordance with the correct center color order
for a Rubik's cube.
                //center LED
                strip1.begin(); // INITIALIZE NeoPixel strip object (REQUIRED)
                strip1.show();
                //set to color 5 (yellow)
                for(int i = 0; i < strip1Num; i++){
                    int color = 5;
                    strip1.setPixelColor(i, strip1.Color(colors[color][0], colors[color][1], colors[color][2]));
                    s1c = color;
                    Serial.println(color);
                }
                strip1.show();
The other LED strips are initialized to a random Rubik's cube
face color (out of red, orange, yellow, blue, green, and white).
                strip2.begin(); // INITIALIZE NeoPixel strip object (REQUIRED)
                strip2.show();
                //set lights to random colors
                for(int i = 0; i < strip2Num; i++){
                    int color = random(6);
                    strip2.setPixelColor(i, strip2.Color(colors[color][0], colors[color][1], colors[color][2]));
                    s2c[i] = color;
                    Serial.println(color);
                }
                strip2.show();
                //same for strip 3 and strip 4
In loop(), when the API reads a true "running" message from the server, Scramblizer starts its kinetic sequence
by first rotating the three motors outwards.
                //rotate stepper
                for (int i = 0; i < 340; i++){
                    moveSteps(false, 1, 3);
                    delay(10);
                }

                //rotate 60 degrees on servo 1
                for (int i=60; i >=0; i--){
                    servo1Pos = i;
                    myservo.write(servo1Pos);
                 delay(60);
                }

                //rotate 60 degrees on servo 2
                for (int i=0; i <= 60; i++){
                    servo2Pos = i;
                    myservo2.write(servo2Pos);
                delay(60);
                }
I chose to use small time delays between each step of the motors so they wouldn't be quite so fast. Then, for each LED strip, I changed the colors to a new random face color, making sure to check that the new randomly generated color was actually different from the current color.
                //change colors on moving group 1
                for(int i = 0; i < strip2Num; i++){
                    int color = s2c[i];
                    while (color == s2c[i]){   // make sure color changes
                        color = random(6);
                    }
                    strip2.setPixelColor(i, strip2.Color(colors[color][0], colors[color][1], colors[color][2]));
                    strip2.show();
                    delay(200);
                }
                strip2.show();
                //same for strip 3 and strip 4
Finally, the three motors rotate back inwards with the same delays for timing.
                for (int i = 0; i < 340; i++){
                    moveSteps(true, 1, 3);
                    delay(10);
                }

                for (int i=0; i <= 60; i++){
                    servo1Pos = i;
                    myservo.write(servo1Pos);
                    delay(60);
                }

                for (int i=60; i >= 0; i--){
                    servo2Pos = i;
                    myservo2.write(servo2Pos);
                    delay(60);
                }
Thanks for reading!